Showing posts with label make up forever. Show all posts

Wednesday, 16 March 2011

FIRSTLOOK: Make-up Forever airbrush-free ad

This MUFE ad from this weeks US mags is the first airbrush free beauty ad. You can see the discolouration on the models arm which would have been evened out usually.


Beauty ads are terrible for airbrushing, I think that's part of the reason people are turning to blogs for info, because you want to REALLY see what a product can do. You've only got to look at the mascara ad's - what a crock of....
But does it make you feel worse to see girls like this sans airbrush? Normally i'd be more than a bit jealous of their gorgeous skin, but I know it's the genius of this foundation. I swear by MUFE's HD Foundation and the colour range is amazing - especially for darker skintones! ( FYI I used this a few posts below for my forties tutorial and my skin looks pretty good. That's so cocky - sorry - i'm going to get a huge zit now, I can feel it!)

Sunday, 13 March 2011

PEEK: Forties make-up, updated technique

I've done a tutorial on this before, so this is just a brief technique update. It's such a simple, timeless look but - for the first time in forever - I got it almost perfect yesterday so thought I’d share.


BASE: Bobbi Brown Creamy Concealer around eyes, followed by a 5-pence sized application of Make Up Forever HD foundation. My way of updating this vintage look is to keep skin glowy and translucent. Add Illamasqua Gleam Cream (benefit high/low beam or Givenchy Mister Bright will do good job) to cheek bones and arch of brows to add sheen and catch the light.

CHEEKS: Bobbi Brown Pale Pink Blush on apples of cheeks only and slight contouring of cheeks using either a bronzer or an appropriate powder. I use MAC’s Contouring Powder, but think it could be a pro product (in which case buy from Carnaby Street store or Sleek do a similar product.) Keep the cheeks really simple to avoid looking like a Victorian doll.

EYES: MAC Paint is my favourite base for eyes; choose a neutral colour slightly lighter than your skin tone to catch the light and widen eyes. Leave the eye shadow, but do add a little contouring in the sockets with the contour powder. (Tip: if you can’t find your sockets, just lift the arch of your brow upwards and it should magically appear!) Curl lashes and apply Bobbi Brown Gel Eyeliner to the lash line with small brush. My eyes are almond shaped, so drop slightly towards the ends, so to counteract this thicken the line towards the outer half of the eye. When you’re extending the flick make sure you pull the line straight across and not downwards with creates too much of a ‘dip.’ Finish with two coats of Lancome Hypnose Precious Cells mascara, top and bottom.

BROWS: Use a small angled brush with appropriate eye shadow colour to fill and define brows, keeping them thick.

LIPS: Use a dark red lip liner to make the cupids bow really rounded. I over-lined my lips here to make them fuller and also coloured in my lips to even out the tone. Apply MAC Ruby Woo lipstick straight from the tube. Et Voila!


Tuesday, 22 February 2011

TUTORIAL:glossy black eyes

I'm a beauty virgin when it comes to eye gloss. Even though it's a look I absolutely adore editorially. So last week I finally gave it a go with mixed ( but overall decent) results. Tutorial below, along with some lessons that I learned the hard way!
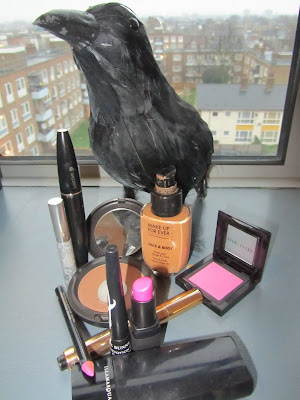


1. First apply black kohl all over the lid and using a blending brush work the colour into the lid and crease. Repeat until it's fairly thick and sooty. Then apply your mascara, curl your lashes, add you falsies etc.
2. Keep the brows undefined and lighten with concealer. Bleach them if you're really brave! The reason to keep them so pale/ out of focus is that strong editorial looks are all about proportion - it's just too much having perfect skin, brows, lips and contouring. The texture of the eye's is the focus, everything else has to be toned down.


3. Using a little bit of concealer, or a very sheer foundation (MAC or MUFE Face and Body) dab any problem areas and set with fine translucent powder (MAC blot powder.) The skin has to be sheer, so add illuminator to cheers and cupids bow (Illamasqua Gleam Cream.)
3. Using a gloss (MAC mixing medium gloss or La Metier de Beaute Magic Cream) dab onto centre of the eyelid only. For a bluey green petrol-esque gleam take the medium and mix in with a dark metallic blue shadow before applying. Use any colour you want really, but keep it dark.


4. Very little blush (Bobbi Brown Pale Pink) and a neutral matte lipstick (Edward Bess)


The result, after a few hours of partying with my girls on Soho! This is Eloise AKA The Circus Cat who blogged for me below BTW!

CAUTION:
-Glossy eyes are high maintenance. You'll need to be on it with the upkeep. Er, so don't get trashed.
- It smudges something chronic, DO NOT TOUCH YOUR EYES THEN TOUCH YOUR FACE. You'll look like a mechanic or Kenickie from Grease - bad times.
- Take your gloss with you for touch-ups.
- Lip gloss on eyes doesn't work - it's not thick enough and is too sticky. Get one of the products above.
- In hindsight, the lashes are too much, just go for lots of mascara and kohl. Keep it really cool and basic - it needs to be thrown together, and never too perfect.

Monday, 1 November 2010

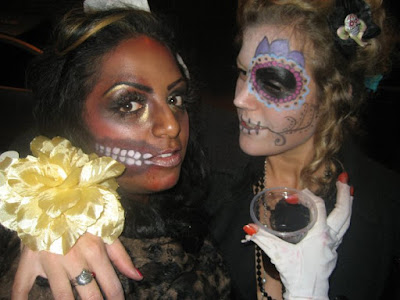
HALLO: Danse Macabre make-up

At last, at last! The promised Halloween pics and don't we look creeepy. I used a mix of mac, MUFE, Illamasqua and Kryolan on myself, the military dead girl aka Louise and the day of the dead chick aka Cara.


Wednesday, 8 September 2010

TESTY: Make up forever

I took precisely 100 euros to Barcelona and promptly spent it all in Sephora, the place where beauty junkies go to get their fix.


L-R:hd primer, hd foundation, hd blush, concealer, hd powder, aquacreme in orange

These products get my total seal of approval. I never understand why the UK hasn't cottoned on to HD make up, it's genius.

Primer
It isn’t one of the slick silicone based primers, it’s pretty fresh and light which is perfect for oily skins.

Concealer

Pretty thick consistency, but on the plus side, you only need a smidgen. Be careful about rubbing the delicate under eye are too much as this product does lend itself to doing that. I put a little on with the applicator, then pat with a finger or with a small MAC duofibre brush. It doesn’t settle in the fine lines which makes it perfect for people starting to get lines around the eyes.

Blusher

This is seriously strong pigment, so you only need a dot on each cheek. Unfortunately, the applicator seems to have other ideas and will dispense a whole weeks worth in one pump. That said, the blush itself lasts all day and this crazy pink works beautifully on darker skin tones. It’s fresh and youthful, and really beautiful.

Powder

This translucent setting powder minimises any fine lines and generally keeps everything in place. I love the texture and the colour; it’s slightly peachy so you don’t get any ghostface in pictures. If you’re darker skinned you might have experienced ghostface before. It’s when you wear a colour corrector or a too pale powder and your face looks like a scream mask. Always a hot look.

Aquacreme

This is pure colour in a pot and JEYSUS, does it stay put. Invest in a good make up remover to get rid of this product. I tried it on my lips and its FEROSH. Thumbs up!! They’re also doing some colours similar to Illamasquas Liquid Metals, which are lovely too.

All in all, uber happy!

Tuesday, 27 April 2010

TUTORIAL: Green with ENVY

Quickety quick eyeshadow tutorial.

I went to a green themed house party (pure carnage), rocking the following slightly crazy look to make up for my lack of outfit:


What I used:


-Base: Mac paint in untitled. Go for one that is a shade lighter than your eyeshadow. If you have trouble with oily eyelids, dust some translucent/blotting powder over the eyelid and then use the paint as a base.
-Colours L-R: Mac Sunny Spot (matte lime green) blended into Mac Humid (emerald green, blended into Mac Nehru (navy blue) which is used on the outer corners and crease. Take some Mac Mineralize Duo in Sea and Sky underneath the eye in the centre to open them up (very reflective pigment.) I also used some Make Up Forever liquidy green stuff, but it didn't blend very well so ignore that *ahem.* To finish, go around the whole eye with the Sunny Spot (matte lime green) to make it really bright.
- Highlights: Illamasqua liquid metal in Solstice (bright gold) to highlight inner eye and Rouge Bunny Rouge highlighting liquid in Sea of Showers to highlight cheekbones. Always take the hioghlight in a "C" shape along upper part of cheekbones and up to the brow bone. Never under the eyes, or it looks a bit weird! (words are my tool, clearly!)
- Lips: Mac Lipliner in Magenta and Mac Girl About Town lipstick which is a bright barbie pink. I apply the liner underneath to give the lippie a stronger colour and a more matte finish.
-Others: Diorshow black mascara, applied from the roots and flicked out to avoid clumping. Chanel black Kohl on waterlineand Illamasqua Tweak blusher in a teardrop shape near cheekbones. If you've got full cheeks like mine, blusher in a big circle on the apples just accentuates this! Go a bit higher up the cheek and always sweep upwards.

Voila!


Tuesday, 19 January 2010

Product Lust: HD Make up

You really have to feel for celebs. If it wasn't enough to be scrutinised by every magazine and newspaper out there, the advent of high-definition TV and film now means that every spot looks like the cavernous void of Mount Etna. They're totally unforgiving.

HD make up, however, is a godsend to celebs and us proles alike. It's a real shame that brands like Youngblood, Smashbox and Make up Forever etc aren’t more readily available here, because some of their products are unfathomably good. Here are my current faves:

Youngblood's Hi-Def Hydrating Mineral Perfect Powder
Quite literally an airbrush in a pot! I actually save it for special occasions, so I can savour its show-stopping effect. To apply: Use a MAC 187 duo fibre brush, but go easy with it or you'll look too powdery/like one of the Golden Girls. At £40, it's not cheap and the packaging could be better designed (what is it with mineral make up and crap packaging?) but it goes on like pure silk.


I’ll try to find the main stockist, but you can get it from:
www.yourwashbag.com


Make Up For Ever HD Foundation

I’ve probably got every foundation going because, as most women know, finding the perfect one is like a needle in a great big bloody haystack of doom. You spend hours labouring over it at a beauty counter, only to get home and find that it's some spectacular shade of crap orangey-brown. But I'm done with all that, and this is why. This oil-free, full-to-medium coverage liquid foundation is pure genius. It photographs beautifully and feels really light on the skin. The customer views on Sephora are mixed, but unless they invent something better (which I doubt!) I’d happily never buy another foundation as long as I live.


You can buy it in the UK from www.makeup-provisions.com

Moi in hi-def using above products!